


Let’s face it, automation is the holy grail of IT. You didn’t get into this field to manually babysit processes, and push buttons, did you? No, you’re here to build things that work while you sip your coffee. Pick your super heros: Copilot Agent, Azure Queue, Azure Function, and PowerShell scripts. Together, they’re like the Avengers of automation—only with fewer spandex outfits and more task efficiency.
How It Works: The Automation Flow
Imagine this:
User Request:
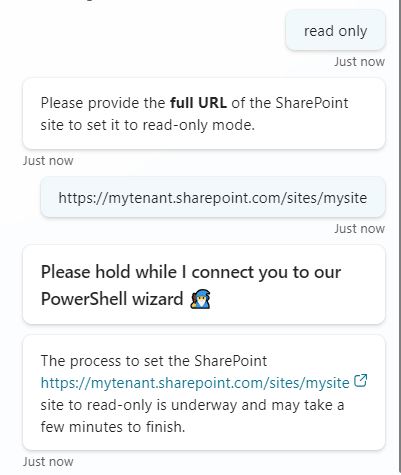
Someone (You) asks Copilot, “Hey, can we push this sharepoint site to read-only mode?”
Copilot Agent Steps In:
It parses the request, confirms the intent, and triggers a message in Azure Queue.
Azure Queue Holds the Task:
Azure Queue acts like the polite receptionist, saying, “Please hold while I connect you to our closest PowerShell wizard.”
Azure function and PowerShell Script Executes:
An Azure Function listener retrieves the queue message, executes the corresponding PowerShell script, and voilà—your actions are carried out seamlessly!
You get the drill… Copilot Agent listens, Azure Queue queues (duh), and PowerShell scripts ( stored in an tidy Azure function execute It) . It’s as straightforward as it sounds!
Azure Queues: Where the Cloud Lines Start
First, what Are Storage Queues? They’re part of Azure Storage ecosystem , and they provide a simple yet fabulously efficient way to send, store, and retrieve messages between applications or services. Queues are addressable using the following URL format: https://<storage account>.queue.core.windows.net/<queue> . Think of them as the cloud’s way of saying, “Take a number, sweetie, and wait your turn!”
Step into the Azure Portal
Log into the Azure portal. If you don’t already have an account, pause right here and make one—it’s free-ish (until you go on a clicking spree). In the search bar at the top, type “Storage Accounts.” Like magic, a list will pop up. Click it like you know what you’re doing.
Create a New Storage Account
Hit the “Create” button. Fill in the essentials:
- Subscription: Your pay-as-you-go playground.
- Resource Group: Fancy term for “folder for your cloud stuff.” Create one if you must.
- Name: Something sensible, please. Avoid naming it “MyFirstQueue123.”
- Region: Pick the one closest to you. Latency matters!
Click Review + Create and let Azure work its magic.
Remember : The Storage account must be in the same region as of Azure Function App, because the resources that talk to one another should be co-located in the same region. This is a requirement for Azure Functions to fire.
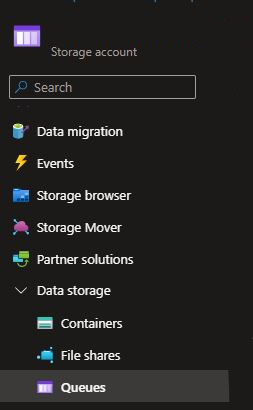
Find Your New Storage Account and Navigate to “Queues”
Head back to the “Storage Accounts” blade and click your shiny new account. In the storage account menu (on the left-hand side), find the “Queues” option and click it like a boss.
Create Your Queue
In the “Queues” page, smash the “+ Queue” button. Queue Name ? Choose wisely. This will haunt you forever. (Well, not forever, but deleting and recreating is annoying.Make note of the queue name somewhere; you will need this value when you create the Azure Function.)
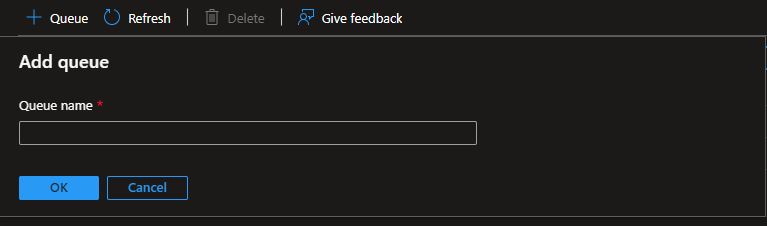
Hit OK, and voilà! Your Azure queue is born
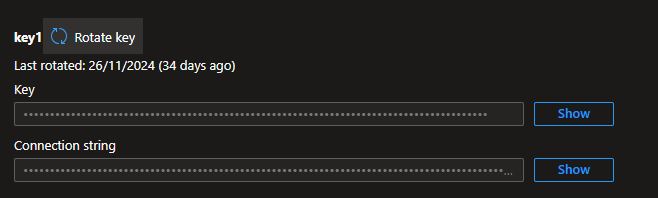
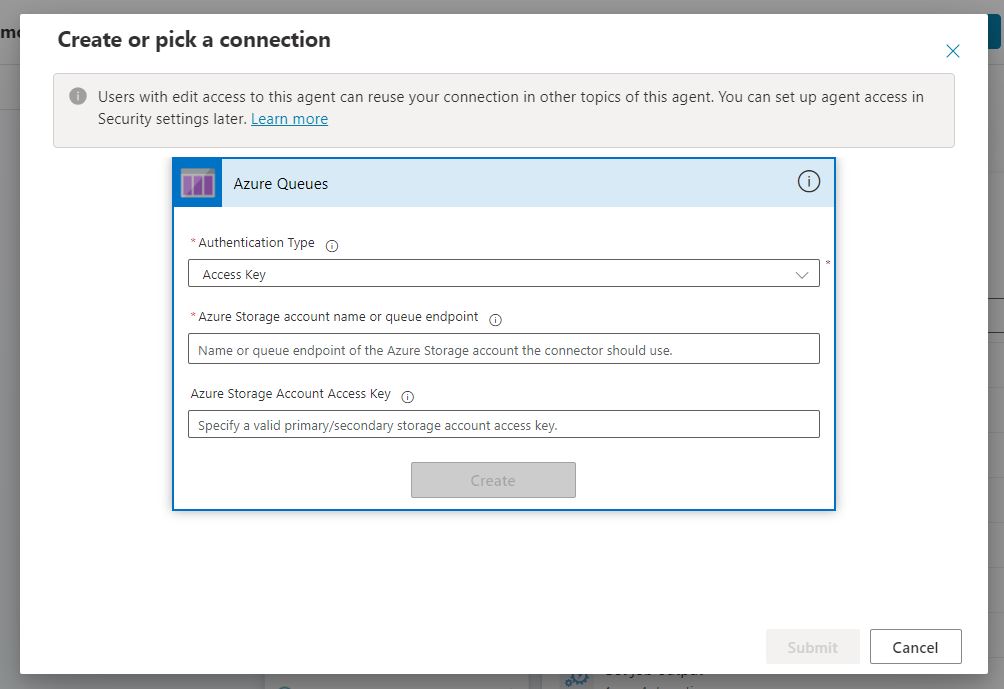
Go back to your New Storage Account, go to a Access Keys and note the Storage Account Name and the key1 Key value. You will need these values when you create your agent.
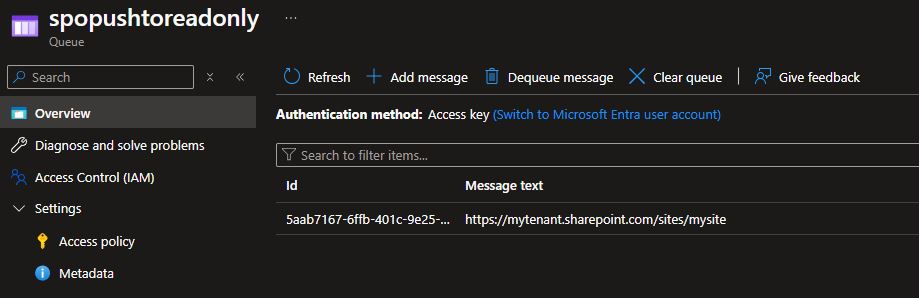
Here’s the gist: When triggered by our Copilot agent, the message (in this case, the URL of the SharePoint we want to modify ) gets pushed to our queue, waiting to be picked up by the Azure Function we’ll create next.
Setting Up App-Only Access to Your Tenant
Alright, buckle up! We’re diving into setting up app-only access to your tenant using client ID and certificate authentication. Don’t worry, we’ll make this painless.
First things first—We’re going to create a self-signed certificate using PnP PowerShell. Here’s how:
Register-PnPAzureADApp -ApplicationName " “C:\CERTVAULT” |
By running that magical cmdlet, you’ll register a new Azure AD Application, and voilà, permissions will be set and ready to rock. You’ll also have granted consent for the app to roam freely in your tenant. Just don’t forget—this requires write access to Azure AD, so be sure you’ve got the right admin permissions.
Don’t forget to jot down those precious values the cmdlet spits out—specifically the pfx file and AzureAppId. Trust me, it’s like the treasure map to your next adventure.
Azure Function: The PowerShell Sorcery Stronghold
Let’s roll up our sleeves and get it done—with style! In the Azure Portal:
- Go to Create a resource → Function App.
- Fill in the deets:
- Name: Make it cool, like
QueueHandlerApp. - Runtime Stack: Pick PowerShell Core and select at least 7.0 as the Version
- Region: Pick something close to home (for the speed, darling).
- Name: Make it cool, like
- Click Review + Create and let Azure do its thing.
When created, navigate to your new Function App, and select App Files
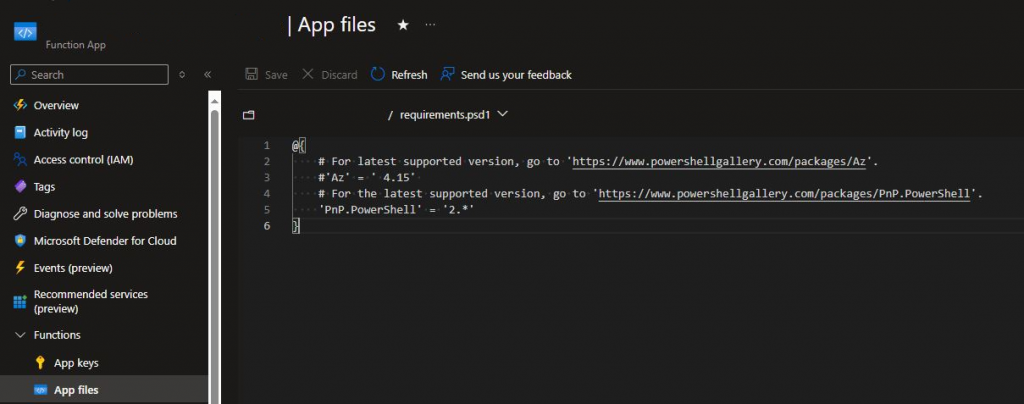
and modify the requirements.psd1 file to suit your needs.
@{ |
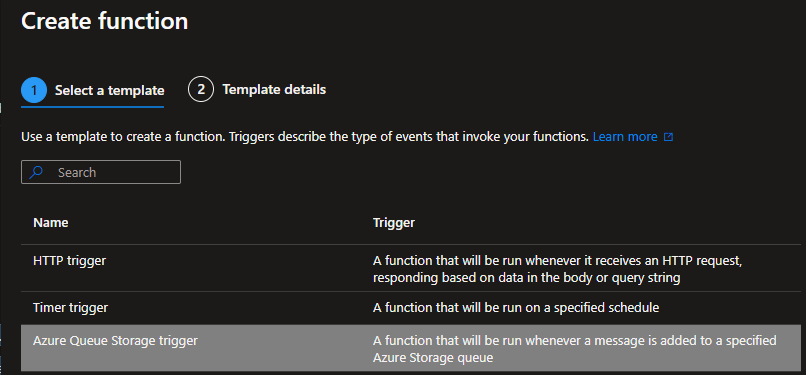
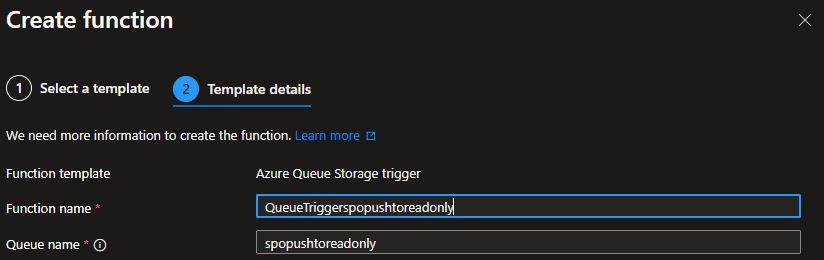
Next, let’s create a new Azure Storage Queue Trigger function , it will ask you for the name of the queue you created earlier.
Time to roll up your sleeves and dive into the Function App playground to grant some permissions to our function and add the self-signed certificate.
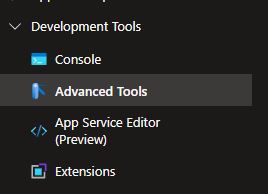
- Head over to the Function App main screen, hit Advanced Tools in the left menu, and click Go. (Yes, really—just click “Go.”) A shiny new tab will pop open.

- From the top menu, pick PowerShell under Debug Console—because we’re all about that scripting life.
- Navigate to the folder:
site\wwwroot\<NAME OF YOUR FUNCTION APP>
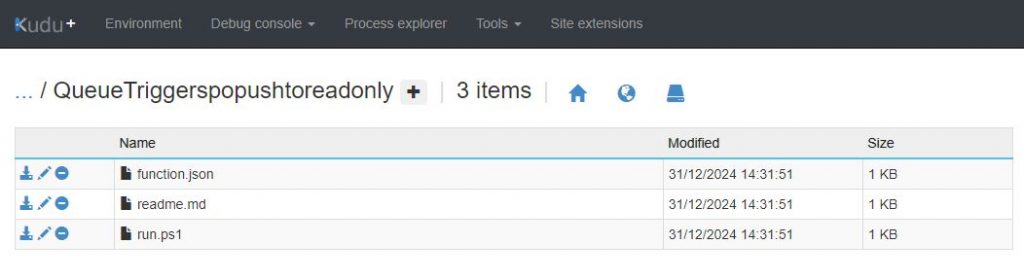
- and drop your precious
cert.pfxfile. That’s right, upload it straight to the folder.
For the big finish, it’s time to dive into some PowerShell coding to handle the heavy lifting—and updating our SharePoint site in the background like a pro. Head over to the Function App main screen, click on your function, and get ready to level up your main PowerShell script, run.ps1 :

param([string] $QueueItem, $TriggerMetadata)Set-PnPTenantSite -Url $QueueItem -LockState ReadOnly |
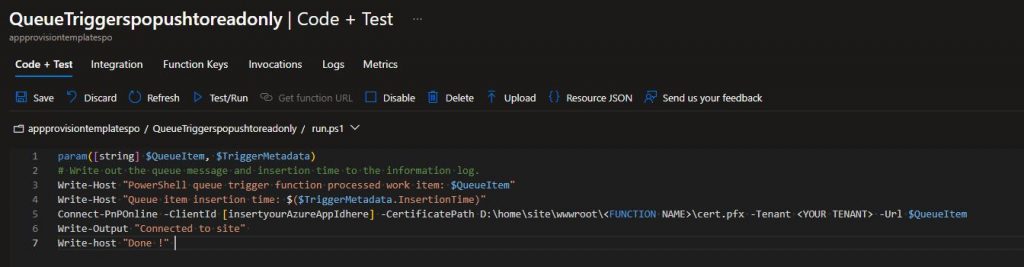
Use the Test and Run option to push some URL into the queue and test your connection string . Why? Because testing is cool.
Now that we’ve tackled the heavy lifting, let’s dive into the fun part—connecting the Azure Queue to our Copilot agent!
Meet Your New Best Friend—Copilot Studio
Think of Copilot Studio as your AI buddy’s HQ. This is where the magic happens—where you breathe life into your Copilot agent and equip it with all the tools it needs to dazzle. First, you need to:
Create Your Agent:
- Log in to Copilot Studio (if you haven’t, now’s the time to question your life choices).
- Click the + New Agent button.
- Name your agent, pic something epic—like “QueueMaster900” or “🧙 Sharepoint Wizard”
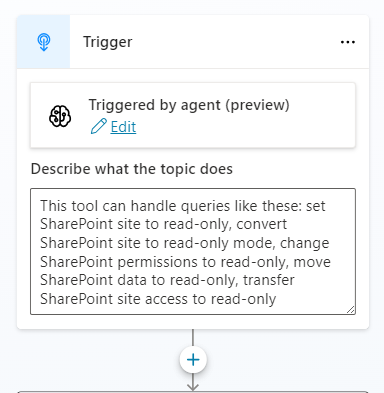
- Define what your Copilot will do, add some intents if needed, but for now, we’re focusing on the real party—custom topics !
- Let’s call our new topic : Sharepoint – Push to READ ONLY
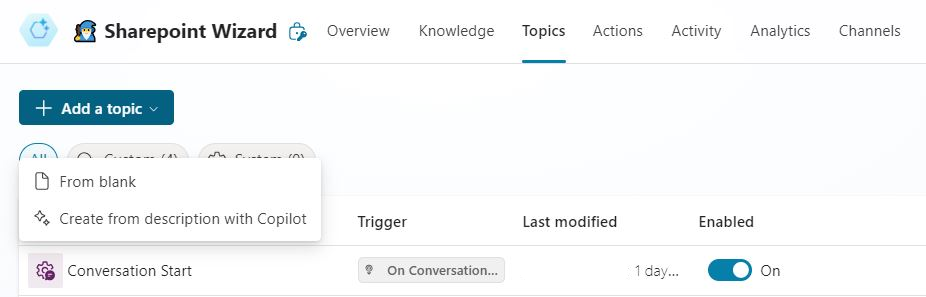
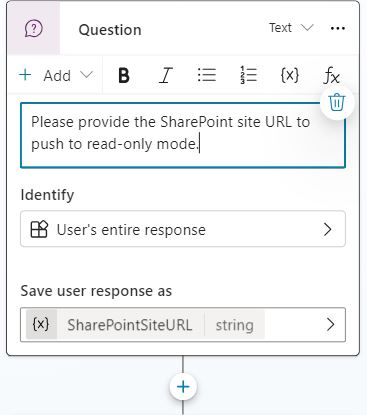
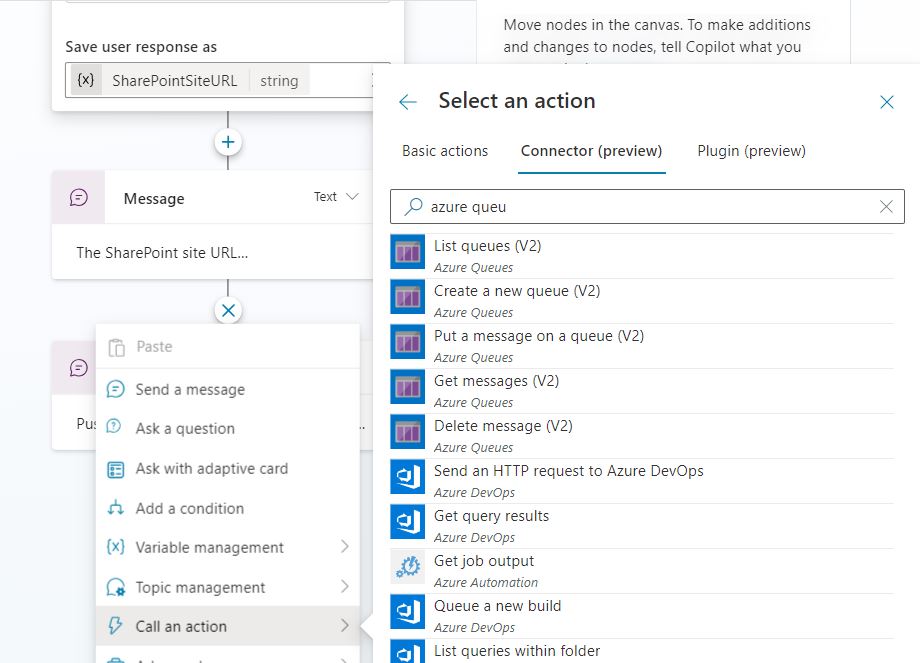
Yes ! Now it’s time to level up by creating a new topic that empowers our agent to add a URL to our previously crafted Azure Queue. You can start from scratch or pull a move straight out of Inception and ask Copilot to create a Copilot (mind blown!). Either way, the key to this whole process is integrating the Put a message on a queue (V2) action to send your collected SharePoint URL into the automation pipeline we built earlier. Let’s queue it up!
Populate the new connection with the credentials you (hopefully) saved somewhere safe!

And voilà!
You’ve got yourself a remarkably polite agent that can switch your SharePoint site to read-only in the blink of an eye. Sure, it’s basic, but it lays the groundwork for something much more sophisticated. Imagine adding features like intelligent logging or sending an email notification to the SharePoint owner when the process kicks off. The only limits are your imagination—and the ever-expanding capabilities of Microsoft Copilot!
Setting up a Copilot agent might sound intimidating at first, but as you’ve seen, it’s more fun than a pizza party at a hackathon. With a few clicks and lines of code, you’ve built an intelligent assistant that’s ready to conquer the cloud.
Now, go forth and keep queuing—there’s a world of automation waiting for you to explore!